What are the steps to fill a swimming pool with a water tank truck?
As a supplier of water tank trucks, I often get asked about the process of filling a swimming pool using our trucks. It's a task that requires careful planning and execution to ensure a smooth and efficient operation. In this blog post, I'll walk you through the steps involved in filling a swimming pool with a water tank truck.
Step 1: Assess the Pool Requirements
Before you start the filling process, it's crucial to determine the volume of water your swimming pool needs. Measure the length, width, and average depth of the pool in feet. Then, use the following formula to calculate the volume in gallons:
Volume (in gallons) = Length (ft) x Width (ft) x Average Depth (ft) x 7.48


For example, if your pool is 30 feet long, 15 feet wide, and has an average depth of 5 feet, the volume would be:
30 x 15 x 5 x 7.48 = 16,830 gallons
This calculation will help you determine how many trips your water tank truck will need to make to fill the pool completely.
Step 2: Choose the Right Water Tank Truck
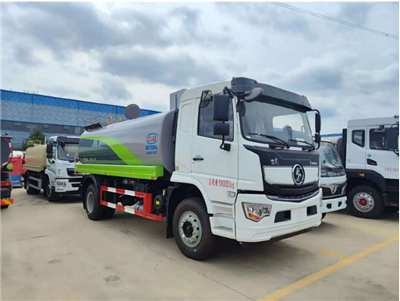
Based on the volume of water required, select a water tank truck with an appropriate capacity. Our company offers a variety of water tank trucks, including the 10cbm Sewage Suction Truck, Sprinkler Truck, and Sprinkler Tanker. These trucks come in different sizes and configurations to meet your specific needs.
When choosing a water tank truck, consider factors such as the truck's capacity, the distance to the water source, and the terrain around the pool. A larger capacity truck may require fewer trips, but it may also be more difficult to maneuver in tight spaces.
Step 3: Locate a Water Source
Once you've determined the volume of water needed and selected the right water tank truck, you'll need to find a suitable water source. This could be a nearby lake, river, well, or a municipal water supply. Make sure the water source is clean and free of contaminants that could harm your pool or its users.
If you're using a municipal water supply, you may need to obtain a permit before filling your pool. Check with your local water department for specific requirements and regulations.
Step 4: Prepare the Water Tank Truck
Before heading to the water source, ensure that the water tank truck is in good working condition. Check the tires, brakes, and all fluid levels, including the engine oil, coolant, and fuel. Inspect the water tank for any leaks or damage and make sure the hoses and fittings are secure.
Load any necessary equipment, such as hoses, nozzles, and filters, onto the truck. It's also a good idea to bring a spare hose and some basic tools in case of any unexpected issues.
Step 5: Fill the Water Tank Truck
Drive the water tank truck to the water source and park it in a safe and accessible location. Connect the intake hose to the water source and the other end to the truck's water tank. Make sure the connection is tight to prevent any leaks.
Open the valve on the water source and allow the water to flow into the tank. Monitor the filling process carefully to avoid overfilling the tank. Once the tank is full, close the valve on the water source and disconnect the hose.
Step 6: Transport the Water to the Pool
After filling the water tank truck, drive it to the location of the swimming pool. Take care to drive slowly and safely, especially if the truck is fully loaded. Avoid sudden stops or turns to prevent the water from sloshing around and causing instability.
When you arrive at the pool, park the truck in a position that allows easy access to the pool. Make sure the truck is on a level surface to prevent any spills or leaks.
Step 7: Fill the Swimming Pool
Connect the discharge hose from the water tank truck to the pool's inlet. Make sure the connection is secure and that the hose is positioned to direct the water into the pool.
Open the valve on the water tank truck and allow the water to flow into the pool. Monitor the filling process closely to ensure that the water level is rising steadily and that there are no leaks or spills.
Depending on the size of the pool and the capacity of the water tank truck, you may need to make multiple trips to fill the pool completely. Repeat steps 5, 6, and 7 until the pool is filled to the desired level.
Step 8: Monitor the Water Quality
Once the pool is filled, it's important to test the water quality to ensure that it's safe for swimming. Use a pool water testing kit to check the pH, chlorine, and other chemical levels in the water. Adjust the chemical levels as needed to maintain a safe and healthy swimming environment.
Regularly monitor the water quality throughout the swimming season to ensure that the pool remains clean and safe for use.
Step 9: Clean Up and Maintenance
After filling the pool, clean up any spills or debris around the pool area. Disconnect the hoses from the water tank truck and the pool and store them properly.
Perform any necessary maintenance on the water tank truck, such as checking the fluid levels, inspecting the hoses and fittings, and cleaning the tank. Regular maintenance will help ensure the longevity and reliability of the truck.
Conclusion
Filling a swimming pool with a water tank truck is a straightforward process that requires careful planning and execution. By following these steps, you can ensure a smooth and efficient filling process and enjoy a clean and refreshing swimming pool all season long.
If you're in the market for a water tank truck, we invite you to explore our range of products, including the 10cbm Sewage Suction Truck, Sprinkler Truck, and Sprinkler Tanker. Our experienced team is ready to assist you in choosing the right truck for your needs and providing you with the support and service you deserve. Contact us today to discuss your requirements and start the procurement process.
References
- "Swimming Pool Volume Calculation." Pool Calculator. Accessed [Date].
- "Water Tank Truck Maintenance Tips." Fleet Maintenance Magazine. Accessed [Date].
- "Pool Water Testing and Chemical Balancing." The Spruce. Accessed [Date].